
springboot集成Knife4j
大约 4 分钟
Knife4j注解生成文档的使用方法与Swagger类似,可以参考前一篇 Sprinboot 集成 Swagger3.0 详解
Knife4j 搭建
Knife4j环境的的搭建和Swagger一样都比较简单,只需要极简的配置即可。
maven依赖
我使用的是较高版本的基于openapi规范的依赖包,OpenAPI2(Swagger)规范是Knife4j之前一直提供支持的版本,底层依赖框架为Springfox。
此次在4.0版本开始Knife4j有了新的变化,主要有以下几点:
- Springfox版本选择的依然是2.10.5版本,而并非springfox最新3.0.0版本
- 不支持以Springfox框架为基础的OpenAPI3规范,放弃Springfox项目的后续版本适配支持工作
- Spring Boot 版本建议 2.4.0~3.0.0之间
<dependency>
    <groupId>org.springframework.boot</groupId>
    <artifactId>spring-boot-starter-web</artifactId>
    <version>2.7.6</version>
</dependency>

<dependency>
    <groupId>com.github.xiaoymin</groupId>
    <artifactId>knife4j-openapi2-spring-boot-starter</artifactId>
    <version>4.3.0</version>
</dependency>
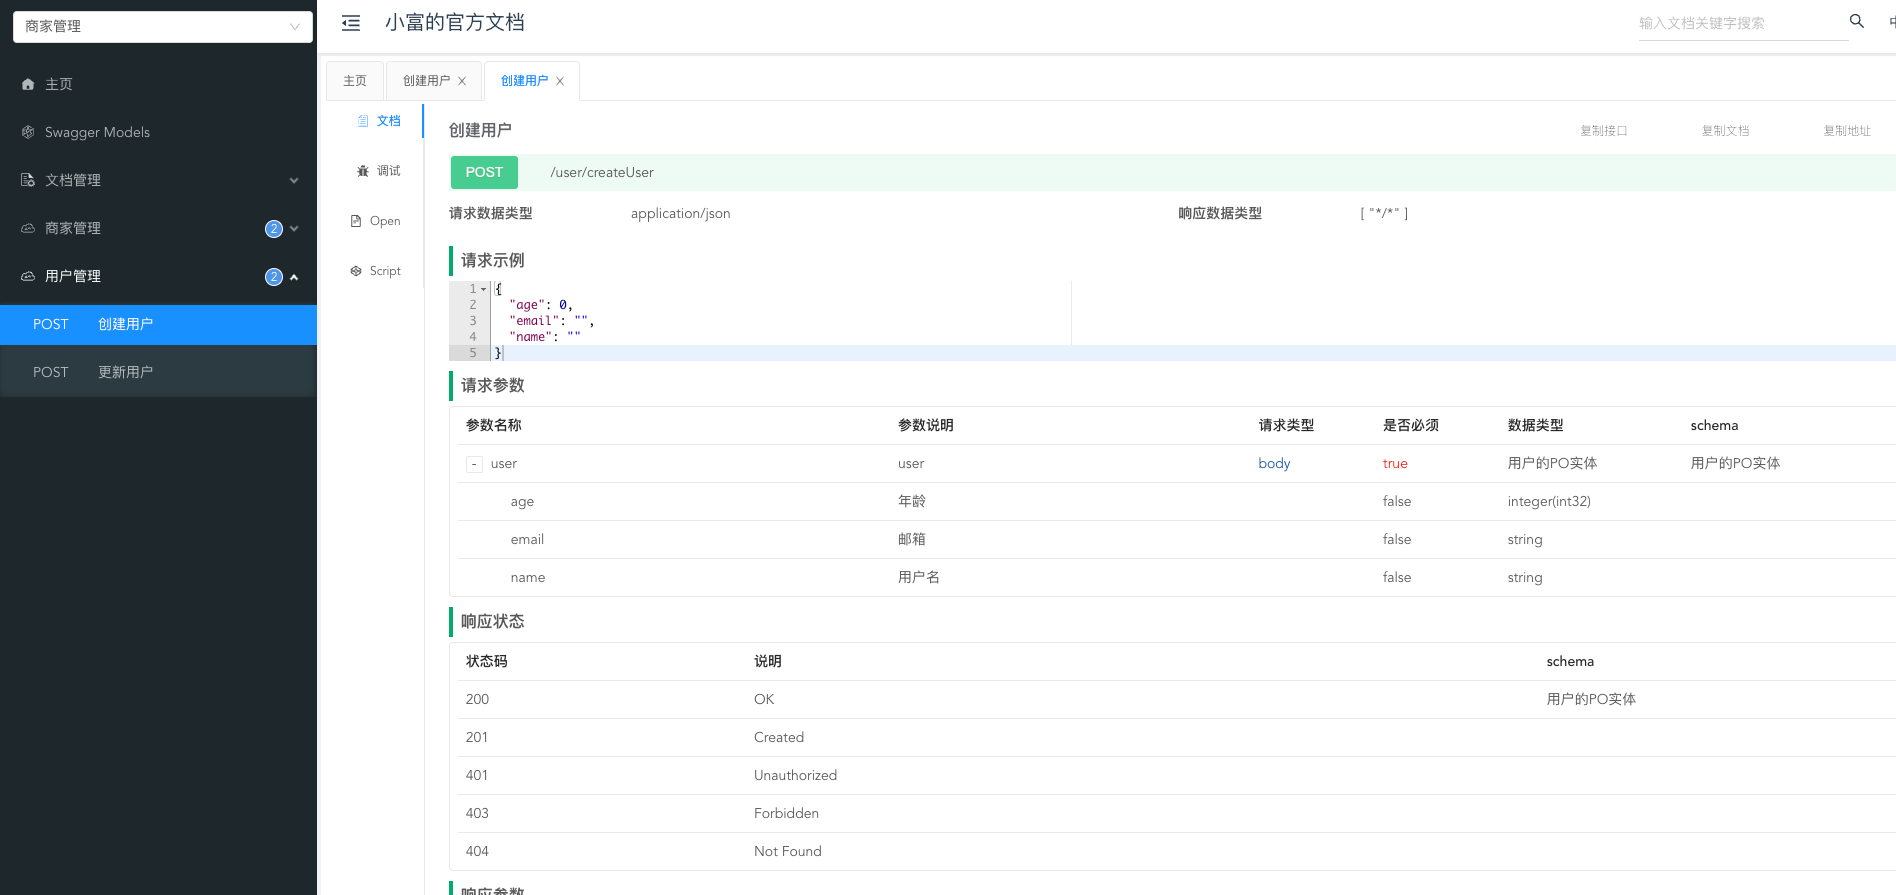
创建接口
我们创建两个控制器controller类,并创建几个API方法加上@Api、@ApiOperation、@ApiParam注解,更多的注解使用可以参考Sprinboot 集成 Swagger3.0 详解。
BuyController类
import com.springboot101.po.User;
import io.swagger.annotations.Api;
import io.swagger.annotations.ApiOperation;
import io.swagger.annotations.ApiParam;
import org.springframework.http.ResponseEntity;
import org.springframework.web.bind.annotation.*;

@RequestMapping("/buy")
@Api(tags = "商家管理")
@RestController
public class BuyController {

    @ApiOperation("创建商家")
    @PostMapping("/createBuy")
    public ResponseEntity<User> createUser(@RequestBody User user) {
        return ResponseEntity.ok(user);
    }

    @ApiOperation("更新商家")
    @PostMapping("/updateBuy/{id}")
    public ResponseEntity<User> updateUser(@ApiParam(value = "商家主键ID", required = true) @PathVariable("id") String id,
                                           @RequestHeader("token") String token,
                                           @RequestParam("name") String name,
                                           @RequestBody User user) {
        return ResponseEntity.ok(user);
    }
}
UserController类
import com.springboot101.po.User;
import io.swagger.annotations.Api;
import io.swagger.annotations.ApiOperation;
import io.swagger.annotations.ApiParam;
import org.springframework.http.ResponseEntity;
import org.springframework.web.bind.annotation.*;

@RequestMapping("/user")
@Api(tags = "用户管理")
@RestController
public class UserController {

    @ApiOperation("创建用户")
    @PostMapping("/createUser")
    public ResponseEntity<User> createUser(@RequestBody User user) {
        return ResponseEntity.ok(user);
    }

    @ApiOperation("更新用户")
    @PostMapping("/updateUser/{id}")
    public ResponseEntity<User> updateUser(@ApiParam(value = "用户主键ID", required = true) @PathVariable("id") String id,
                                           @RequestHeader("token") String token,
                                           @RequestParam("name") String name,
                                           @RequestBody User user) {
        return ResponseEntity.ok(user);
    }
}
Knife4j配置
在以前的版本中,开发者需要在配置类中手动使用
@EnableKnife4j注解来使用增强功能,自2.0.6版本后,只需要在配置文件中配置knife4j.enable=true即可,不在使用注解开启了。
@Configuration
@EnableKnife4j
public class Knife4jConfig {

}
而且自2.0.6版本开始,将UI界面中一些个性化配置从代码中剥离,我们可以直接在application.yml文件中配置文档属性,使用起来更加的简洁了。
# Knife4j配置
knife4j:
  # 开启增强配置
  enable: true
  #开启Basic登录认证功能
  openapi:
    title: 小富的官方文档
    description: "关注公众号:程序员小富"
    email: 515361725@qq.com
    concat: 程序员小富  # 作者
    url: http://xiaofucode.com
    version: v1.0 # 版本号
    license: Apache 2.0
    license-url: https://fire100.top
    terms-of-service-url: https://fire100.top #API服务条款
文档的基础信息配置
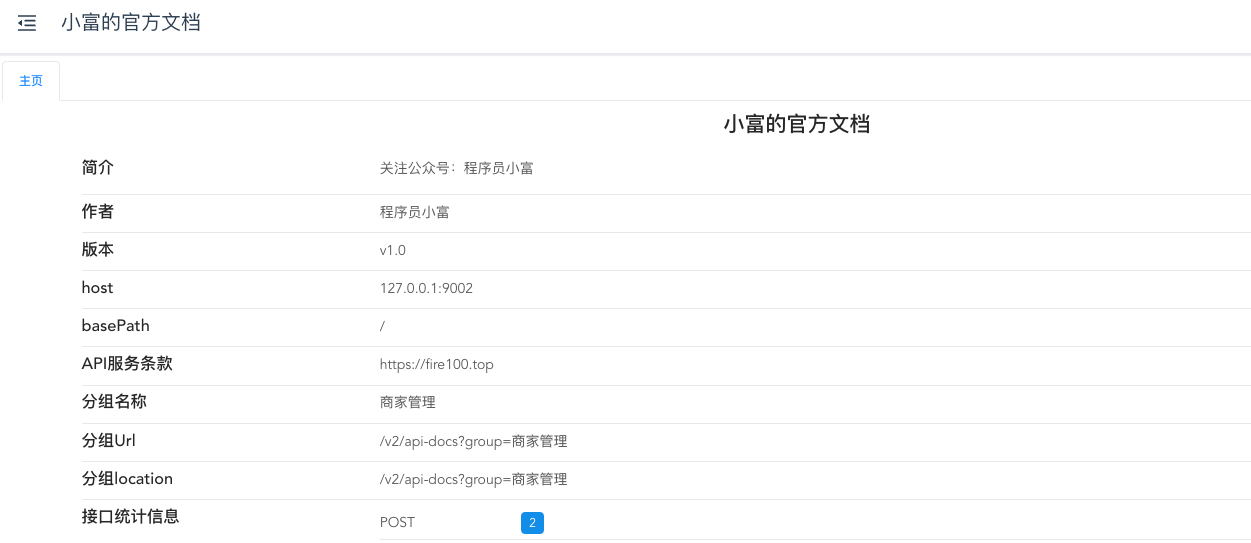
默认情况下,如果不设置API的分组,Knife4j会扫描全部标注了@Api、@ApiOperation等注解类,将它们全部放入到default分组。
API分组
knife4j的分组支持我们在yml文件中配置,开启knife4j.openapi.group。
例如:新建user、buy模块就代表了不同的分组,其中的子项:
group-name:分组的名称;api-rule:组内资源扫描策略,目前支持根据package类路径扫描,annotation扫描特定注解;api-rule-resources:资源路径(数组),策略为 package 时填写完整的controller类路径,策略为 annotation 时填写特定注解的完整路径;
# Knife4j配置
knife4j:
  # 开启增强配置
  enable: true
  #开启Basic登录认证功能
  openapi:
    title: 小富的官方文档
    description: "关注公众号:程序员小富"
    email: 515361725@qq.com
    concat: 程序员小富  # 作者
    url: http://xiaofucode.com
    version: v1.0 # 版本号
    license: Apache 2.0
    license-url: https://fire100.top
    terms-of-service-url: https://fire100.top #API服务条款
    # API分组配置
    group:
      user:
        group-name: 用户管理 # 组名
        api-rule: package # 扫描规则,是根据包路径还是请求路径
        api-rule-resources: # 扫描的资源
          - com.springboot101.controller.user
      buy:
        group-name: 商家管理
        api-rule: package
        api-rule-resources:
          - com.springboot101.controller.buy
      #user:
#        group-name: 用户管理
#        api-rule: annotation
#        api-rule-resources:
#          - io.swagger.annotations.Api   # 扫描带有 @Api 注解的接口
#      buy:
#        group-name: 商家管理
#        api-rule: annotation
#        api-rule-resources:
#          - io.swagger.annotations.Api   # 扫描带有 @Api 注解的接口
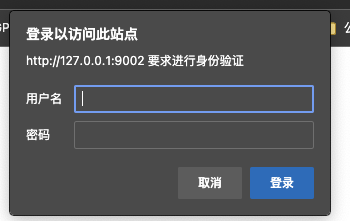
用户认证
knife4j内置了Basic认证,只要在开启basic下配置认证用户名和密码即可。
knife4j:
  #开启Basic登录认证功能
  basic:
    enable: true
    # Basic认证用户名
    username: admin
    # Basic认证密码
    password: 123456
再次访问文档路径时会弹出登录框。
完整配置
server:
  port: 9002

# Knife4j配置
knife4j:
  # 开启增强配置
  enable: true
  #开启Basic登录认证功能
  basic:
    enable: true
    # Basic认证用户名
    username: admin
    # Basic认证密码
    password: 123456
  openapi:
    title: 小富的官方文档
    description: "关注公众号:程序员小富"
    email: 515361725@qq.com
    concat: 程序员小富  # 作者
    url: http://xiaofucode.com
    version: v1.0 # 版本号
    license: Apache 2.0
    license-url: https://fire100.top
    terms-of-service-url: https://fire100.top #API服务条款
    # API分组配置
    group:
      user:
        group-name: 用户管理 # 组名
        api-rule: package # 扫描规则,是根据包路径还是请求路径
        api-rule-resources: # 扫描的资源
          - com.springboot101.controller.user
      buy:
        group-name: 商家管理
        api-rule: package
        api-rule-resources:
          - com.springboot101.controller.buy
      #user:
#        group-name: 用户管理
#        api-rule: annotation
#        api-rule-resources:
#          - io.swagger.annotations.Api   # 扫描带有 @Api 注解的接口
#      buy:
#        group-name: 商家管理
#        api-rule: annotation
#        api-rule-resources:
#          - io.swagger.annotations.Api   # 扫描带有 @Api 注解的接口
代码示例
Github
本文 Github 案例地址